This discussion spans 7 days and is due before midnight on Monday of week 3.
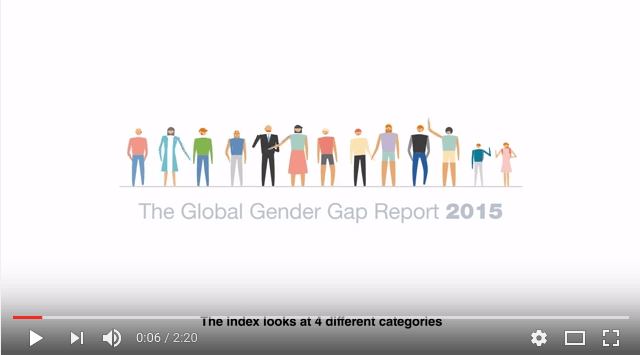
Link opens in a new window. Yasmina Bekhouche is a Project Lead of the Global Challenge on Gender Parity at the World Economic Forum. 2015.
Learning outcomes
Students will be able to 1) discuss feminist theory, women's choices, race and cultural issues, and barriers related to gender and technology,
2) research current trends of women and technology of different cultures/countries,
3) analyze relationships among science, technology, and society using critical perspectives or examples from historical, political, or economic disciplines,
4) analyze the role of science and technology in shaping diverse fields of study over time,
5) articulate in writing a critical perspective on issues involving science, technology, and society using evidence as support.
Introduction
Today you a scholar seeking answers. Through research and reading, you'll begin to answer the world's pertinent questions
about cultural norms, how they affect groups, and why change is needed.
How are societies structured to help or hinder groups of women?
When hindered, what gaps exist?
How are these gaps measured around the world?
What myths exist that contribute to the lack of progress?
Does technology help reduce gender gaps around the world? ...and so on.
These and more questions arise when we study cultural norms. The readings and your research will help answer these questions.
1. On Monday, start reading and viewing.
After viewing the five videos, read/view at least the first three scholarly articles:
By Yolande Strengers. The Conversation. November 2015
Then search for and listen to/read a few popular or other scholarly articles, podcasts, and videos.
In a new tab, add various search phrases to a Google, Bing, or Yahoo search bar to locate articles. Switch to the Scholar, News, Videos, and Images channels to see different results.
gender gap
gender digital divide
gender social constructions
gender gap USA [or Mexico, China, India, Korea, Saudi Arabia, Kenya, etc.]
glass ceiling
gender and housework
myth of progress
stereotype threat
intersectionality
intersectional feminism
and your own search phrases
2. By Wednesday, start discussing the readings. (4 points)
In the Canvas Discussion area.
Reply to one of the numbered topics provided in the existing threads to hold your place.
There are 17 questions; no more than 3 people per question for the initial response.
In 400 words or more, recap the scholarly and popular articles you read.
Write in a text editor like Word or Google Docs.
Edit the thread you held then paste in your writing from the text editor.
Cite sources using embedded hyperlinks in the Titles of Articles you mention so that readers can quickly open them in a new browser tab.
Mention support for your ideas, provide solutions, and note personal experiences.
Keep personal anecdotes to a minimum; the reading recap is key here.
I want to hear what you learned, not necessarily what you already know.
Write in your own words. Copying blocks of text from other sources will earn a 0 score.
3. By 9:00am the following Monday, reply to three others' threads. (4 points)
Glance through all the responses.
Respond to at least three others' threads (but not more than 5).
Challenge the opinions of others but back them up with research.
Research means you searched for and found other articles that support your ideas.
Writing means you wrote in your own words. Do not paste in large passages of others' writings.
Note which sources you found that support or contradict the ideas presented.
To keep the discussion experience positive for everyone, please remember the Guidelines and Tips.
Typical Scoring Rubric
4 points for writing 400+ words as a response to the question, using proper grammar and spelling, research, and links embedded in the titles of the articles within your text. This thread is the most important.
Reduction in points occur when the following are not included:
-1.00 Reading recap and related research.
-1.00 Enough writing.
-0.25 Embedded links in titles within the text.
4 points for writing 3 replies with additional research and links embedded in the titles within the text. More than a few sentences are expected but no need to write as much as the initial post. Reduction in points occur when the following are not included:
-0.50 Less than 3 replies.
-1.00 Research.*
-0.50 Enough writing.
-0.25 Embedded links in titles within the text.
* Research means you searched for and found other articles that support your ideas.
This activity spans 7 days and is due before midnight on Sunday of week 2.
Learning Outcomes
Expect to spend 2 or more hours completing the setup.
In this chapter, students will construct a website, improve their level of comfort with technology, improve their communications style, and enhance creativity. They will also achieve a level of understanding regarding personal lifestyles and how choices can change the future.
Introduction
Blog writers cover a variety of topics (see 100 Must Read Blogs…By Women!), including commentary about other sites, world events, personal news, industry news, arts and letters.
Some blog writers choose to invite comments from their readers, creating an online conversation much like a forum.
In many cases, people blog via Social Media applications like LinkedIn, FaceBook, Twitter, and many others.
When you take possession of knowledge and transform it into something meaningful and useful, publishing that knowledge makes it your own and shows me (your guide) and students (your peers) where you are in the learning process. You will use a blog website to publish the following:
Progress on projects (weekly website POSTS)
Project writings (website PAGES)
(optional) Peer feedback. (website COMMENTS)
As you begin this activity and complete all others, you may feel great levels of frustration. Most of you will be trying new skills so I want to remind you that:
You MUST ask for help (using the Canvas Inbox) when you get stuck.
Use the instructions provided to reduce time.
Remember that by the end of the term, many of these new skills will be comfortable.
Don't expect them to be easy right away. A student once told me:
I think I learned a lot about using the tools you can find online, and even how to find them. I thought about this as I was posting my last project, I realized I was posting all of my information, creating pages and embedding links like I had been doing it forever. The process of posting everything became a lot less frustrating as the term went on. I feel more comfortable at my computer, and I feel like I have valuable skills I won't soon forget.
Found in an anonymous survey, Fall 2007.
2.1 Create an account.
Quick Wordpress.com account setup.
For this course, I want you use WordPress, an open source website application.
It is free, well designed, powerful, and provides all necessary functions for presenting your projects online.
Four ways to host Wordpress exist: Use OSU's Blogging server, add an installation to your ONID or personal web server, reuse another Wordpress.com blog, or set up a new Wordpress.com blog at the same account.
The development versions of these choices are not the same in 2016, so all of you will be setting up a new website at Wordpress.com,
where the latest technology is provided.
If you already have a Wordpress.com account, then login and add a new website.
If you don't already have a Wordpress.com account,
go there now and sign up using your OSU or personal Google account to make daily login easier.
From the Setup screen, add your first and last name, the course title, choose a few purposes for your site, and note your comfort level.
If your set up screens are different, do not panic...just keep going.
If prompted to choose a page layout or Theme, choose one that has 2 columns (but do NOT choose one that has a dark background; it creates too much eye fatigue).
The new Penscratch 2 theme is best of this course.
If you are not prompted to change the theme yet, continue to the next step.
When prompted to add a domain or keyword, type your first and last name with no spaces.
If your name is taken then try just your first initial with last name.
Select the Free plan from the Pick a Plan screen.
In the Create your Account screen, type the credentials you'll need to login again, either your OSU ONID email address or your personal email address. Type a strong password to keep from getting hacked.
Click the Create a New Account button.
While you wait for the site to be generated, check your email account for the confirmation email. Click the Confirm Now button in the message.
Close the Create an Account tab of the browser to keep from getting confused. The link in the email message will take you to your new website.
View the Site Login screen in the new site found in the new tab of your browser.
Use the popup tutorials to learn about each navigation item. Or skip them and follow my detailed instructions below.
2.2 Update the Profile.
Update Wordpress.com Profile and Settings.
Your profile will describe you in public areas, such as the Wordpress Reader. It also allows you to change some settings for how you use Wordpress.
Click the Profile button at the top right.
Fill in the First name, Last Name, and About Me fields.
In the Public Display Name field, type your First and Last name using upper and lower case letters and spaces, just like you normally type it.
Click Save Profile Details.
2.3 Update the Notifications.
Notifications are useful for power users who need to stay abreast of all things Wordpress.
Click the Notifications button at the top right.
Click the Updates tab and uncheck Research, Community, Promotions, and News categories to avoid being bombarded with email. I recommend leaving Suggestions checked.
Click Save Settings.
2.4 Update the Settings
When logged into Wordpress, you'll usually land in the My Site area, which is traditionally called the Dashboard.
If you landed in the Reader area, click the My Site button.
At the bottom of the left sidebar menu, click Settings.
If you forgot to name your site with your first and last name and describe the site using the course name, then edit the General Settings.
In the General Settings tab, revise the Site Title to use your First and Last Name in upper and lowercase letters and spaces.
Add a Tagline that mentions Gender & Technology. You can change this after the term ends to say whatever you like.
Change the Site Timezone to fit your location. Corvallis is in the Los Angeles zone.
Choose Hidden from the Privacy list if you do not want Google, Bing, and Yahoo to search your site (or be listed on search engines).
Click Save Settings.
2.5 Write a New Post.
Add a Post to Wordpress.com
Blog Posts are essentially news articles that list a variety of metadata for easy searching and organization.
Each Post retains a Title, Text, Date, Author, Category, Tag List, Featured Image, Sharing options, Format, Excerpt, Location, and Discussion options.
For this course, you'll only need to update the Title, Text, and Category.
Click the Blog Posts button at the left to see a list of posts already in your site.
The First Blog Post must now be deleted or modified because it is just a placeholder.
Click Edit button and change the Title to reflect your current mood about setting up this website.
Select and delete the text of the Post and write your own recap about how the process is going so far.
Click the Categories & Tags button at the left and + Add a New Category called 'Gender & Technology'. Each time you write a new post for this course, select that Category.
Write in complete sentences with proper grammar. Always review your writing to ensure accuracy, since your peers and I are reading it!
Click the Featured Image link at the left and Delete it. It may be too big to view Posts above the scroll line, so either leave it blank or add an optimized image of your own. Please don't upload any images larger than 100px (they load too slowly).
Remove the excerpt text, or write your own.
Uncheck the Sticky status so it doesn't show up on your home page every day for eternity.
Click Update to save your changes.
To navigate back to the main Dashboard, click the Wordpress ←Back button.
From the Dashboard menu, click
the Customizer button next to the Themes link.
Update the Home Page Settings so that the Posts are listed on the home page.
2.6 Edit existing Pages.
When you view the home page (the page that shows your new Post), you might also see a link for the Contact Page that provides a form so others can write to you securely.
Notice that these two Pages are not the same as Posts. Posts appear as news feeds on your home page, while Pages are separate and accessed by this Primary menu.
In the Dashboard, click the Pages button (or if you are viewing the Contact Page, click the Edit button).
Click the Contact Page to Edit. Notice that the Page's editing screen is very nearly like the Post editing screen.
Add a paragraph to the Contact page and introduce yourself. Do not post too much personal data; especially not your email, residence, and phone number. Check grammar and spelling.
Click Update to save the changes.
Click the ← Back button to select and Edit the Contact Page. Edit the text that accompanies the page if you want to add a note about how often you'll be responding to messages.
2.7 Update Primary menu options.
Each of the three major projects for this course will have their own section of Pages in your site.
So that you and your readers (me) can access those pages, we'll have them automatically added to the Primary Menu when viewing the site from the home page.
From the Dashboard menu, click the Customize button next to the Themes button at the left.
When the Customizer loads, click the Pencil editing icon next to the Pages menu.
Click the Automatically add new top-level pages to this menu button. Don't skip this step.
Click the Save and Publish button.
2.8 Add Cultural Research Project Pages.
Each of the three projects will have a set number of pages with subheadings. Learn how to make Parent Pages, Child Pages, and subheadings:
Click back to the My Site Dashboard area, click the Add button next to the Pages link at the left.
Title this page Cultural Research.
In the text editing area of the screen (below the toolbar if visible or below the title), add a short description, which we'll edit later: Introduction for this project.
Click the Publish button.
This page will be a Top Level Page (or 'Parent' Page) for the next set of pages.
Publish the page and
click the back button.
This project will have four numbered 'Child' pages.
Add a new Page titled 1. Culture.
Add these lines of text (subheadings) to the text area:
Description of the culture of origin; the heritage; its influence
Tools, devices, appliances, and machines in use by women in that culture and era
With the text still selected, click the italic and bulleted list icons
to turn off those styles; they were added when pasted. The subheadings should not be italic with bullets.
Select the subheadline text and choose paragraph from the Toolbar's Transform menu.
Then, transform them again into Headings. You may have to transform each headline individually.
When you edit a block of text, the editing menu on the right side of the screen changes to a different pane.
Click the Document tab to get back to the Document pane.
Click the Page Attributes Button and Select the Cultural Research Parent Page.
Publish the page and
click the back button.
Add a new page and title it 2. Trends.
Add this Subheadline text to the Text editing area and apply Heading 2:
Statistics related to Education and Business/Industry gender in the culture and era.
How have the statistics changed over time?
How did education and business influence her technology?
With the text still selected, click the italic and bulleted list icons to remove the styles.
Choose Heading 2 from the drop down list:
Click the Page Attributes button and Select the Cultural Research Parent Page.
Publish the page and
click the back button.
Add a new page and title it 3. Biography.
Add this Subheadline text to the Text editing area and apply Heading 2:
Childhood influences and education
Work experience
With the text still selected, click the italic and bulleted list icons to remove the styles.
Choose Heading 2 from the drop down list:
Click the Page Attributes button and Select the Cultural Research Parent Page.
Publish the page and
click the back button.
Add a new page and title it 4. Technology.
Add this Subheadline text to the Text editing area and apply Heading 2:
Inventions
Tools and Methods
With the text still selected, click the italic and bulleted list icons to remove the styles.
Choose Heading 2 from the drop down list:
Click the Page Attributes button and Select the Cultural Research Parent Page.
Publish the page and
click the back button.
Add a new page and title it 5. Bibliography.
Add this text to the page as a placeholder: Author, Title, Publisher, Year, and URL
Click the Page Attributes button and Select the Cultural Research Parent Page.
Publish the page and
click the back button.
To navigate back to the main Dashboard, click the Wordpress Back button.
2.9 Add Gender Lens Project Pages.
Apply what you learned about making Pages, removing Bullets, applying Headings, and assigning Parent Pages to create 3 Pages with these Subheadings:
Page Title:Gender Lens. (Use this as the Top Level Parent Page.)
Text (no subheadings):
Introducing the Gender Lens project.
Page Title:Timeline Factors
subheadings:
Design & Prototyping
Manufacturing & Production
Marketing
Sales
User Support
Maintenance
Recycling & Disposal
Page Title:Social Factors
subheadings:
Biological
Social
Cultural
Economic
Political
Educational
Page Title: Bibliography
No subheadings needed.
2.10 Add Financial Analysis Page.
Apply what you learned about making Pages, removing Bulleted lists, and applying Headings to create 1 Page with these Subheadines:
Page Title:Financial Analysis
subheadings:
The dream and why is it important to me
How others accomplished the same dream
Barriers and support systems
Current Finances
Budget for the Dream
Conclusion
2.11 Update the Primary Menu
View the site from the home page and notice the new links added to the Primary Menu. Hover over the menu to see dropdown menus. Or if you have a different theme, see them listed in the sidebar.
If, after completing the making of Pages, your horizontal or vertical menu of Pages
does not show all the parent and child pages correctly, use the Menus function in the Customizer to fix them.
Add the child pages to the Primary menu with the + icon and drag them to the right so they are indented.
If dragging doesn't work well on you computer then use the Reorder link to activate the up, down, right, and left arrow to move them into position.
Each projects' parent and child menus should look like this from inside the Dashboard Menu editing area when you're done
and like the screenshot above when looking at the site from the live home page:
View a screencast of the Customizer Menu editor for updating the Pages menu.
2.12 Update your first Blog Post.
Login to Wordpress.
Phew! That was a lot of new knowledge and skills!
Your site's home page should now look like this when you View Site:
Click on the Blog Posts link in the Dashboard.
Edit your first Blog Post to include notes about your successes and challenges related to adding project Pages.
Remember that you're writing for a large audience, not just the Instructor.
If you have unresolved problems, use the Canvas Inbox to ask the Instructor for help.
You'll work in here each week to keep from forgetting how Wordpress works.
Criteria to meet by the end of week 2
By the end of week 2, these items must be completed to earn all 10 points:
Blog account is active.
Site title is Student's first and last name (update in Settings).
Tagline says the name of the course.
The default Blog Post has been modified to include a Title and Text about the set-up experience so far.
The Contact page has been updated.
The Parent and Child Pages have been added and appear in the Primary Menu.
Child Pages include the required subheadings.
Posts and Pages are written in proper English.
The Layout includes two columns.
Pages are listed in the Primary menu when viewing the site live (horizontal at the top or in the vertically in the Sidebar).
Posts are listed on the home page's main content area.
The correct live URL for the home page has been submitted in Canvas.
If you have questions about how to use Wordpress, please ask the Instructor via the Canvas Inbox.
I will score your Blog Post every Monday morning. Each week's post must discuss the required content as noted in the Chapters and be submitted before midnight on Sundays.
2.13 Update your Email Signature.
Open your email application's signature editing screen and add the URL to your new website. Save.
2.14 Submit the URL to your new post.
View your site live (not from the Dashboard). The address will be like this: firstlastname.wordpress.com
Select the URL for your home page or your new Post.
Paste the URL into the ⚙ Configure Website assignment link in Canvas.


 to turn off those styles; they were added when pasted. The subheadings should not be italic with bullets.


