WGSS 320 Gender & Technology

Oregon State University, School of Language, Culture, and Society

Chapter 6

Discuss Readings: Peer Review. (8 points)

This discussion spans 4 days and is due before midnight on Thursday of week 6.

Introduction

Audio icon

By reviewing your classmates' Cultural Research projects, not only will you learn more about what you could revise in your own project writing, but you'll learn more about other inspirational women! Even though your project is not done, present it in the Discussion to help other students improve their work and hear from other students how you might improve your own work. Continue making improvements to the project all week.

1. On Monday, present your Cultural Research project. (.5 points)

Canvas icon
  1. In the Chapter 6 Module's Peer Review Discussion in Canvas, reply with a new thread titled with your topic name.
  2. In the message box for that thread, paste in the URL/address for the Introduction/Parent Page of your Cultural Research project. DO NOT PASTE the text of your entire project. Just provide the URL, or add a hyperlink to the topic name.

2. By Wednesday, start discussing the projects. (6 points)

  1. Read at least two Cultural Research projects listed in the Week 6 Peer Review discussion.
  2. Reply to those two and
    1. Review them using the following Scoring Criteria (which was introduced in Chapter 3).
      Paste the scoring criteria list (below) into a new Reply thread and
      offer these kinds of feedback for each line item:
      • Open-ended questions about the content to expand thinking.
      • Recommendations about structure, citations, spelling, and grammar.
      Research and your original writing on an historical or modern female technologist from another country/culture is included:
      __ General description of the culture in that era. (step 5.1.1.4.1 )
      __ What tools, devices, appliances, and machines were commonly used by women in that culture and era? (step 5.1.1.4.1 )
      __ Statistics related to gender and Education and Business/industry in the culture and era.  (step 5.1.1.4.2 )
      __ How have the numbers changed and what was their influence? (step 5.1.1.4.2 )
      __ Childhood influences and education. (step 5.1.1.4.3)
      __ Work experience. (step 5.1.1.4.3)
      __ What tools and methods did this woman employ in her research and inventions? (step 5.1.1.4.4)
      __ Provide details and define terms to help a lay audience understand the complexities of the technology. (step 5.1.1.4.4)
      __ Historical significance and trends are cited in captions or inline.  (step 5.1.2)
      __ Text passages are cited inline. (step 5.1.2)
      __ Bibliography includes all sources used. (step 5.1.1.4.5 )
      __ Links embedded in the inline citations and bibliography when applicable. (step 5.3.5)
      __ Material is presented online in a multi-page website. (step 5.3.4)
      __ Navigation to each page is included on each page. (step 5.3.6)
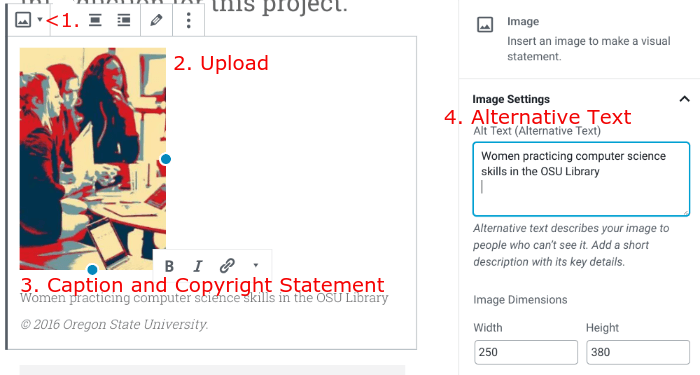
      __ Media include descriptive alternative text or caption. (step 6.2)
      __ Media include proper copyright statement. (step 6.2)
      __ Images are optimized for fast downloading. (step 6.1)
      

    3. By midnight on Thursday, reply to three others' threads. (1.5 points)

    1. Reply with answers to at least two questions asked by your reviewers.

Add media to the Cultural Research project. (40 points)

This last section of the Cultural Research project spans 7 days and is due before midnight of week 6.

Introduction

Audio icon

This week culminates the research project. If you've completed the previous required milestones then your project will read like a professional document...complete with the right research, writing in your own words, properly cited sources with embedded links, and a proper bibliography.

Because we live in the Age of Visual Culture, your readers will expect to connect with your project beyond the written word. The addition of photos, data visualizations, and video will entice them to read each page.

Instructions

6.1 Locate relevant images.

Click the View Page button in a Google image search.

Google Images is the most common place to locate images, but use other search engines or databases as needed.

  1. Search for media that supports the content of your project. I recommend:
    • Portraits for the Introduction page and Biography pages.
    • Maps, historical photos, photos of women working with tools for the Culture page.
    • Charts, graphs, infographics, and/or interactive data visualizations for the Trends page.
    • Photos of the tool/device, photos of factory/lab tools where the tool/device is made, patent drawings, and screenshots (if software related) for the Technology page.
    • Movies that show processes.
  2. Keep careful track of where you found the media, who owns the copyright, and how you may use them. (Note: Google does not own the copyright of photos, art, or movies displayed on images.google.com or YouTube.com.) Click the View Page button to redirect to the originating web site.
  3. Optimize images that are too big for web sites. You might need to crop and resize images to fit within your theme's content area as well as reduce the file size so they load faster. Learn to do that using the Optimize tutorial.
  4. Save the files to your hard drive. Usually, you can right-click and Save Image As... then locate a folder on your computer. I recommend using the same folder as you do for your weekly PDF backup files. You may want to rename the files so they are memorable...perhaps adding the Project Page name, like this:
    • biography-marie-curie-portrait.jpg
    • technology-radioactive-isotopes.jpg
    • trends-french-science-gaps.jpg

6.2 Upload images to the Cultural Research Pages.

Wordpress icon

Once images are ready to be placed online, they must be uploaded to Wordpress and added to the pages of your project.

  1. Login to your Wordpress site and click the My Site button to get to the Dashboard.
  2. Click on the Pages button.
  3. Click on the Cultural Research Parent Page link to edit it.
    • Place the cursor at the location where you want to add an image.
    • Click the Image icon and upload a file from the Internet.
      Upload under a paragraph from the Image icon.
    • Add a descriptive sentence to the Caption field below the image.
      Add a caption below the uploaded icon and copy it to the Alternative Text field at the right.
    • Also add the copyright statement, which includes three items: the copyright symbol 2) the year published, and 3) the photographer- or company-owner's name. It should look like this: © 2016 A&E Television Networks, LLC.. Make the symbol by copying this one ©.
    • Copy the Caption field's text (but not the copyright statement) and paste it into the Alt text field at the right. This text makes your site more accessible to visually-impaired listeners.

6.3 Edit and reposition images.

  1. To edit an image, click on it to see the editing pane popup on the right side of the screen.
  2. If you want to see all images in the Media Library, then click on the Image icon and click Media Library
  3. To reposition an image, click on it, then choose either the left-align or right-align icon in the toolbar. This will allow the paragraphs to float next to it.
    Choose right or left align to float the image next to a paragraph.

6.4 Locate and embed relevant audio or video.

YouTube movie with caption in a paragraph.

For the Technology page, locate a video that shows how the topic person's technology works. Or for the Trends page, locate a video that discusses gender bias on education and business in the topic person's culture.

Try one of these three methods:

A. URL method
  1. On the page where you located the video, look around for the Sharing and/or Embed button.
    • Copy the URL provided.
  2. On the Wordpress page, Paste the URL after an existing paragraph.
    • Add a new paragraph under the movie and type a short description/title and add the copyright statement. For example: Biography of Marie Curie.© 2013 Bio.True Story.
    • Click Update.
    • View the Page to ensure the movie loads and is properly situated.
B. Embed (new method)
  1. Copy the URL of your video choice from the browser address bar.
  2. Place the cursor on the location where you want to add a video. Click the + icon to add an embedded video. To see the Embed menu, scroll down passed the Most Used options. Click the Plus icon to scroll to the Embed a YouTube option.
  3. Open the Embed list and click on the appropriate social media icon. For example, if you copied the URL of a YouTube movie, then click the YouTube icon to paste in that URL.
  4. The movie should appear in your Page now. Add the caption as per Step A above.
Embed HTML (old method)

Sometimes, Wordpress won't automatically embed the movie. In that case, you might need to use a bit of HTML code to embed the file:

  1. On the video page, look around for the Sharing and/or Embed button.
    Embed iframe from YouTube
    You may have to right-click on the movie to see the embed options.
    Right-click on a YouTube movie to locate the iframe tag.
    • Copy the iframe tag/code provided.
  2. On the Wordpress Page's editing screen, click the TEXT or HTML tab next to the Visual tab at the top right of the Toolbar.
    • Scroll through the text and code to locate the paragraph just below where you want to embed the movie.
    • Paste the code into a new paragraph where you want the movie to show up.
    • Click back to the Visual editing tab.
    • Add a new paragraph under the movie and type a short description/title and add the copyright statement. For example: Biography of Marie Curie.© 2013 Bio.True Story.
    • Click Update.
    • View the live Page to ensure the movie loads and is properly situated.
C. Shortcode Method

If that method didn't work then try using a Wordpress Shortcode, like this:

  1. On the Wordpress Page's editing screen, click the TEXT or HTML tab next to the Visual tab at the top right of the Toolbar.
    • Scroll through the text and code to locate the paragraph just below where you want to embed the movie.
    • Paste this shortcode into a new paragraph where you want the movie to show up:
      • [youtube https://www.youtube.com/watch?v=tSXTCODrvIY&w=854&h=480]
    • Replace the red ID text with your movie's ID text.
    • Add a new paragraph under the movie and type a short description/title and add the copyright statement. For example: Biography of Marie Curie.© 2013 Bio.True Story.
    • Click Update.
    • View the Page live to ensure the movie loads and is properly situated.

6.5 Create a Merged Final Draft.

PDF file icon

Your classmates gave you some helpful feedback. If suitable, incorporate their ideas. At the very least, fix your grammar and spelling.

If your classmates did not give you enough feedback, then use NetTutor's Paper Center to get more specific help (inside Canvas).

To reduce confusion, NetTutor and the Instructor will need one file to review, so print and merge PDF files using the following method.

Print:

  1. Install the Print Friendly & PDF Chrome browser extension.
    1. Go to Chrome Settings → More Tools → Extensions
    2. Search for Print Friendly & PDF.
    3. Click the + Add to Chrome button.
  2. While looking at the live view of your parent page, click the new icon next to the address bar of the Chrome browser. Hover over items to eliminate from the printed version of your page, such as menus and widgets. Click the items to delete.
  3. Click the PDF button to save the new copy of the page to your hard drive.
  4. Do the same for each of the pages of your project.

Merge:

  1. At PDFMerge! upload each of the Project PDF files (in order) using the Choose File buttons.
  2. Save the merged_document.PDF file to your hard drive in the same folder used previously.
    • Change the file name to reflect your name and project name.

Upload the combined file into the Canvas course's NetTutor → Paper Center button. Share the Chapter 3, 4, and 5 instructions with the tutor so they know what to look for.

Check for the tutor's feedback within a day or two. Incorporate changes that make sense.

6.6 Submit the project to the Gradebook in Canvas.

Canvas icon

The scoring of your work will be done inside Canvas's TurnItIn function. This allows me to check for plagiarism as well as score with a rubric. I will also review the project from your live Wordpress site.

If you made changes due to the NetTutor review, then remake a merged PDF file.

To submit the file:

  1. Click on the ✏ Complete the Cultural Research Project. assignment link.
  2. Click the Load... button to get the TurnItIn popup window.
  3. Upload the final merged PDF file of your project in the popup window.
  4. Click the Submit Assignment button.
  5. Click the Grades menu to confirm that the file submitted.

Do not attempt to submit a second draft after the deadline. It won't work.